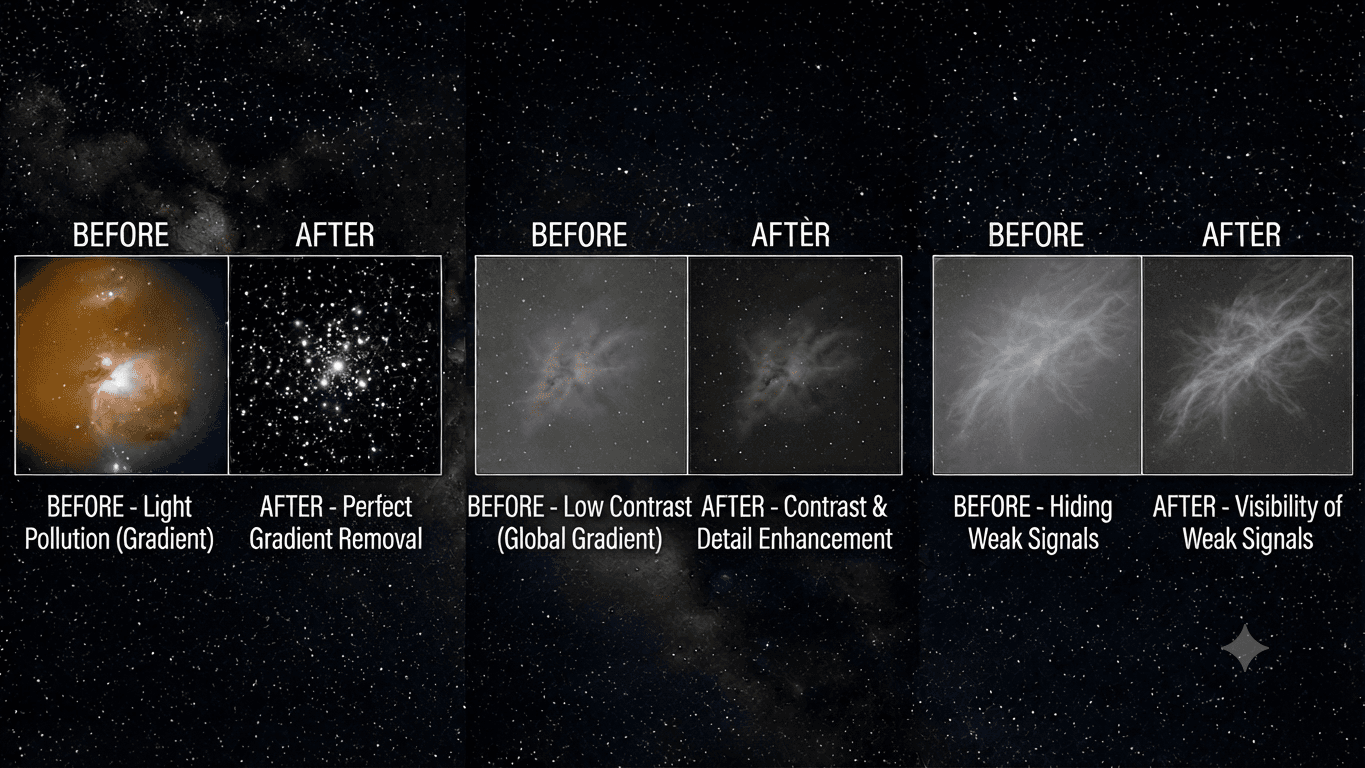
You pull up an image after a beautiful night, you stretch it, and there it is: the sky background is not black and uniform. One corner has turned brown, another blue, or a gradient sweeps across the entire frame. That defect is the gradient, and it is probably the most universal problem in astrophotography, especially when you shoot from a suburban backyard. The good news: once you know where your gradient comes from, correcting it becomes straightforward.
In this article we explain what a gradient really is, how to tell apart its four main families (ground-level light pollution, the Moon, cirrus, dew), how not to confuse it with a bad flat or genuine nebulosity, and how to remove it cleanly in GraXpert or PixInsight. Not sure what kind you are dealing with? Let the Doc identify the gradient type in your image in seconds.
Key takeaways |
|---|
1. A gradient is a slow, progressive variation in the brightness of the sky background, caused by a stray light source (streetlights, the Moon, an atmospheric veil). It carries no useful information about your target: it is pure pollution to be subtracted. |
2. The direction and color cast of a gradient betray its cause: an orange tint pointing toward the polluted horizon (ground-level light pollution), a bluish cast pointing toward the Moon (lunar gradient), a diffuse and blurry pattern (cirrus), a veil starting from one corner and worsening through the night (dew). |
3. The classic trap: mistaking a sky gradient for vignetting (a flat calibration failure) or for real galactic nebulosity (IFN). Getting the diagnosis right determines the right treatment. For correction, GraXpert and DBE/ABE work very well, but good acquisition habits (site, filters, narrowband) remain the best prevention. |
What a gradient is, and why it ruins your image
A gradient is a smooth, continuous variation in the brightness (and often the color) of the sky background from one edge of your frame to the other. Instead of a uniform background you get a ramp: one side brighter, the other darker, sometimes with a color cast that shifts progressively across the image.
The cause is almost always the same: a stray light source illuminates your sky unevenly. Photons from that source (streetlight glow scattered by the atmosphere, moonlight, diffusion through a thin cloud layer) add on top of your target's signal, but with an intensity that depends on which part of the sky you are pointing at. The closer you look to the horizon or to the source, the brighter the background becomes.
The problem is that this stray signal is broad and slowly varying, unlike stars or the fine details of a nebula. While your image is still dark (before stretching) you do not see it. But as soon as you push the histogram to reveal faint regions, the gradient explodes: it rises with the useful signal and crushes contrast. You end up unable to stretch hard enough without burning out one corner of the image.
Good news: a gradient contains no information about your target. It is pure pollution. You can therefore model it and subtract it without losing any of the object, provided you have correctly identified it. For a complete overview of defects that can spoil an image, take a look at our overview of common astrophotography problems.
The 4 main gradient families (learn to tell them apart)
Not all background variations look the same. The direction, the color cast, and the way the gradient evolves over the course of a night tell you what caused it. Here are the four cases you will encounter most often.
Ground-level light pollution (one-sided, orange cast)
This is the dominant gradient at urban and suburban sites (Bortle 5 to 7). Ground-level light pollution comes from streetlights, signs, and public lighting whose glow is scattered by the atmosphere back toward your sensor. Because this light rises from the horizon, the edge of your frame pointing toward the city (or toward the horizon) is noticeably brighter.
Typical signature: a gradient directed toward one specific edge, often with an orange or brownish cast (a legacy of old sodium streetlights, though cool-white LEDs are gradually changing that). The gradient is stable over time as long as you point at the same area, and it intensifies as your target descends toward the horizon. For the full signature, visual cues, and recommended steps, see the light pollution gradient defect page.
Lunar gradient (directed toward the Moon, bluish cast)
When the Moon is up, even partially, its light scatters through the atmosphere and creates a gradient oriented toward it: the edge of your frame closest to the Moon is the brightest. The cast is generally bluish or grayish, because moonlight is reflected sunlight, close to white, scattered toward blue by the atmosphere (the same mechanism as the daytime blue sky).
What distinguishes a lunar gradient from ground-level pollution is that it evolves through the night: the Moon moves, so the gradient direction rotates hour by hour. Its intensity depends on the lunar phase and the angular distance to your target. The lunar gradient defect page explains how to recognize it and when to give up shooting (target too close to the Moon in broadband or narrowband).
Cirrus veil (diffuse halos, variable transparency)
Cirrus clouds are thin high-altitude clouds, sometimes invisible to the naked eye in the dark. They do not block light entirely but scatter it: they reflect ground-level light pollution back onto your sensor and create diffuse halos around bright stars, with a background brightness that varies irregularly rather than as a clean gradient.
The signature is less geometric than a classic gradient: you see fuzzy zones, milky halos around bright stars, and above all a transparency that changes from one sub to the next (some frames are visibly veiled, others clear). That is the distinguishing sign: a cirrus veil is not stable, it drifts with the clouds. The cirrus haze defect page helps you sort affected frames before stacking.
Dew fogging (veil starting from a corner, worsening over time)
Dew (or condensation) forms when the front lens or corrector cools below the dew point. A film of droplets settles on the optic and scatters light. The signature is very characteristic: a bright veil that typically starts from one edge or corner (where dew begins to form) and progressively intensifies through the night instead of remaining stable.
How to distinguish it from cirrus: dew evolves monotonically and cumulatively (it only gets worse until you warm the optic), whereas cirrus comes and goes. If your first frames are clean and the last hour is drowned in a veil, check your front lens: you will most likely find condensation. The fix is mechanical (dew heater strip, dew shield). Everything is detailed in the dew fogging defect page.
Family | Direction | Color cast | How it evolves through the night |
|---|---|---|---|
Ground-level light pollution | One fixed edge (toward city / horizon) | Orange to brown | Stable, intensifies as target descends |
Lunar gradient | Toward the Moon | Bluish to gray | Direction rotates with the Moon |
Cirrus veil | Diffuse, halos around stars | Milky, neutral | Variable, comes and goes (uneven frames) |
Dew fogging | Starts from a corner or edge | Milky veil | Continuously worsens |
Gradient or calibration defect? The trap to avoid
Before reaching for a gradient removal tool, make sure you are actually dealing with a sky gradient. Two look-alikes regularly get mistaken for gradients: residual vignetting (a calibration defect) and IFN (a real sky signal). Misdiagnosing either can mean erasing real signal or hiding a flat problem that will come back every session.
How to tell it apart from vignetting / bad flats
Vignetting is a darkening of the frame edges caused by the optical train (less light reaches the edges than the center). Normally, flats correct this: they are images of a uniform source that map the exact transmission profile of your system. When calibration is good, vignetting disappears and the background is flat.
But if your flats are bad (wrong exposure, focus or rotation changed between flats and lights, dust that moved), you get a vignetting residual: a brightening or darkening that follows radial symmetry centered on the optical axis. That is where the distinction matters: a real sky gradient is directional and linear (it crosses the frame in one direction), whereas a flat residual is radial and symmetric (darker all the way around, brighter at the center, or the reverse). If you see concentric darkening in all four corners simultaneously, that is a calibration issue, not a sky problem.
The right reflex: if the defect is radial, redo your flats rather than crushing it with a gradient tool (which can leave artifacts and mask the real problem). To learn how to take good flats, see our article on darks, offsets, and flats. The residual vignetting and flat mismatch defect pages detail the respective signatures.
How to tell it apart from IFN (real galactic nebulosity)
Here is the reverse trap, and the crueler one: erasing real signal while believing you are removing a gradient. IFN (Integrated Flux Nebulae), also called galactic cirrus, are faint interstellar dust clouds illuminated by the diffuse light of the entire galaxy. They appear as brownish, irregular wisps in the sky background, particularly in regions near the galactic poles.
Unlike a gradient, IFN is not a smooth monotonic variation: it is a structure, with outlines, filaments, and nuances. A gradient goes from bright to dark in a continuous, predictable way; IFN has shapes. The test: if the suspect area shows reproducible detail from one session to the next, captured at different times and with different gradient orientations, it is most likely real signal.
The danger: a poorly tuned background extraction tool (samples placed on the IFN, model too flexible) will treat that structure as background and flatten it. You lose a target you spent hours capturing. The fix: place your sample points only on genuinely empty zones, and when in doubt be conservative with model flexibility.
Removing a gradient in post-processing (DBE, ABE, GraXpert)
Once the diagnosis is confirmed (it is a sky gradient, not a bad flat or IFN), it is time to process. The principle is always the same: the software samples the sky background in areas you consider empty, builds a model of the pollution, then subtracts it from your image. Three tools dominate: GraXpert (free), and DBE/ABE inside PixInsight.
Step-by-step with GraXpert
GraXpert is a free, open-source application that has become the reference tool for background extraction, including for users who do not have PixInsight. Its Background Extraction function is effective and largely automated. Here is the workflow:
Load your stacked, linear (unstretched) image. Working on the linear image, before any stretch, gives the best results: the gradient is still a simple additive signal at that stage.
Run the automatic sample point generation. GraXpert places a grid of points on what it estimates to be the sky background.
Review and manually correct: remove any point that falls on the target, on a bright star, on an IFN region, or on any nebulosity. This is the most important step: a misplaced point injects signal into the model and digs a hole in your image.
Choose the correction type (subtraction, recommended for an additive gradient such as light pollution) and adjust the smoothing. Higher smoothing makes the model more rigid and better respects real structures; too low and it risks fitting the IFN.
Compute the correction, then compare before and after. The background should become neutral and uniform with no dark halo around the target (which would indicate over-correction).
GraXpert also includes an AI-based denoising module, but that is a separate step: do not conflate background extraction and denoising in the same operation.
DBE and ABE in PixInsight
Inside PixInsight, two classic processes handle this. ABE (Automatic Background Extractor) models the background with a polynomial of a degree you choose: fast and automatic, ideal for a simple, linear gradient (degree 1 to 4). DBE (Dynamic Background Extraction) is more powerful and fully manual: you place the sample points yourself, which lets you handle complex gradients from multiple sources, or crowded fields where automation would be fooled.
Practical rule: ABE for simple, quick cases; DBE when the field is tricky (proximity of a large nebula, IFN, gradient from multiple directions). In both cases, work in linear mode and choose the subtraction mode for an additive gradient (division is reserved for multiplicative defects like vignetting, which you should correct with flats anyway). Note: recent versions of PixInsight also offer GradientCorrection, which modernizes the approach, but the principle of careful sample placement remains identical.
Tool | Mode | Best for |
|---|---|---|
GraXpert (Background Extraction) | Semi-automatic, free | All skill levels, outside PixInsight, solid default |
ABE (PixInsight) | Automatic (polynomial) | Simple, linear gradient, fast processing |
DBE (PixInsight) | Manual (sample points) | Complex fields, IFN, multiple gradient sources |
Preventing gradients at acquisition (filters, site, narrowband)
The best gradient is the one you never have to correct. No software tool replaces good acquisition, and the weaker the gradient to begin with, the cleaner the removal (fewer artifact risks, more dynamic range preserved). Here are the key levers, from most effective to most accessible:
The site: this is factor number one. A few dozen kilometers away from the city (moving from Bortle 7 to Bortle 4) reduces light pollution by a very large factor. When feasible, moving the telescope beats every filter in the world.
Aim high: the closer your target is to the zenith, the less atmosphere and polluted air mass you cross. Avoid shooting a target low above a city. Plan your sessions when the target culminates.
Light-pollution filters (L-Pro, IDAS, broadband types): they block the wavelengths emitted by sodium and mercury street lighting. Useful for color imaging under polluted skies, but their effect is partial, especially against broad-spectrum white LEDs. They reduce the gradient; they do not eliminate it.
Narrowband filters (Ha, OIII, SII, or dual-narrowband types like the L-eXtreme): these are the ultimate weapon against light pollution. By passing only a narrow band around the emission lines of the nebula, they reject most of the polluted continuum. On emission targets, narrowband lets you shoot from the city center and even under the Moon with a minimal gradient. Downside: useless on galaxies and star clusters (continuous spectrum).
Dew heater strips: essential against dew fogging. A heating band around the front lens keeps the optic above the dew point and eliminates that type of gradient at the source.
One final point: a gradient shows up very early, already on individual subs or the master. You do not need to wait for the final image to spot it. Learning to read a raw sub saves you from wasting a night on a poorly positioned target. Our guide on analyzing a raw astrophoto sub shows how to spot a gradient (and many other defects) from the very first frames.
FAQ: gradients and sky background in astrophotography
How do I tell whether my sky background has a gradient or real nebulous signal?
A gradient is a smooth, continuous, monotonic variation: it goes from bright to dark in one direction, with no outlines or structure. Real signal (nebulosity, IFN) has shapes, filaments, and reproducible detail. The decisive test: compare frames taken at different times or in different sessions. A gradient changes direction (especially a lunar one) or intensity, while a real structure stays in the same place in the sky. When in doubt, place your background sample points only on genuinely empty zones and stay conservative with model flexibility.
GraXpert or DBE: which one to use for gradient removal?
GraXpert is free, fast, and semi-automatic: perfect for the majority of cases and for users who do not have PixInsight. Its background extraction delivers excellent results on a standard gradient. DBE (PixInsight) is fully manual and more powerful for complex fields: a large nebula filling the frame, IFN, gradients in multiple directions, where placing sample points by hand makes the difference. In short: GraXpert (or ABE) for simple cases, DBE when the field is tricky and you want full control.
Does a light-pollution filter remove the gradient entirely?
No, it reduces it without eliminating it. A broadband filter (L-Pro, IDAS) blocks certain wavelengths from artificial lighting, but it passes the continuum, and it is increasingly ineffective against broad-spectrum white LEDs that are replacing old sodium streetlights. You will have a weaker gradient, therefore easier to remove in post-processing, but it will still be there. To truly crush light pollution, narrowband (on emission targets) or moving to a darker site are far more radical solutions.
Why does my gradient come back after background extraction?
Three common causes. First, you worked on an already-stretched image: the gradient is no longer a simple additive component there, the model handles it poorly, and it reappears on the next stretch. Work in linear. Second, misplaced sample points (on the target or a star) corrupted the model, leaving a residual. Third, over-correction dug a dark halo around your target that you are interpreting as a residual gradient: increase the smoothing (rigidity) of the model. And if the "gradient" is actually a radial flat residual, no gradient tool will fix it durably: redo your flats.
How do I tell a lunar gradient from ground-level light pollution?
Three clues. The color cast: a lunar gradient is bluish or gray (reflected sunlight scattered toward blue), ground-level pollution is more orange or brown (sodium). The direction: pollution points toward one fixed edge (the city, the horizon), a lunar gradient points toward the Moon. The evolution: ground-level pollution stays stable as long as you point at the same area, while a lunar gradient rotates through the night because the Moon moves. Also check your conditions: Moon up and close to your target, it is the likely culprit.
Can the gradient come from a bad flat rather than the sky?
Yes, and it is the most common trap. A mismatched flat (wrong exposure, focus or rotation changed between flats and lights, dust that moved) leaves a vignetting residual. The distinction is geometric: a real sky gradient is directional and linear (it crosses the frame in one direction), while a flat residual is radial and symmetric (concentric darkening of all four corners, centered on the optical axis). If the defect is radial, do not crush it with a gradient tool: redo your flats, otherwise the problem will return every session.
Conclusion
The gradient is arguably the most universal defect in astrophotography, and paradoxically one of the easiest to correct once properly identified. Everything comes down to the diagnosis: recognize the family (orange pollution directed toward the city, bluish lunar gradient, diffuse cirrus veil, dew settling in), and above all do not confuse a sky gradient with a radial flat residual or with real galactic nebulosity.
Once the diagnosis is made, the correction is almost mechanical: GraXpert for simplicity, ABE for quick cases, DBE for complex fields, always on a linear image and with sample points placed on empty sky. And remember that the best approach is good acquisition: aim high, choose your site carefully, switch to narrowband on emission targets, heat your optic against dew. If you are still unsure about the origin of the gradient polluting your sky background, run a DocStellar diagnosis: the Doc will tell you in seconds whether it is light pollution, the Moon, cirrus, dew, or a flat to redo.